

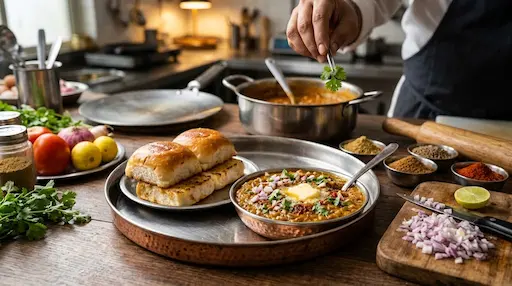
Nothing captures the vibrant energy of Mumbai street food quite like a steaming plate of buttery pav bhaji. If you have ever wanted to recreate that magical flavor at home, learning the popular pav bhaji chef ranveer brar method is your golden ticket. Celebrated chef Ranveer Brar brings professional culinary mastery to everyday ingredients, transforming a simple kitchen meal into an unforgettable experience.
The History and Origin of Mumbai’s Favorite Street Food
Historically, pav bhaji originated in the bustling textile mills of Mumbai during the 1860s. Mill workers needed a quick, filling lunch that could be eaten rapidly between shifts. Street vendors cleverly mashed leftover mixed vegetables on a hot flat griddle with spices and heaps of butter, serving it alongside soft bread rolls known as pav. Over decades, this humble laborer’s meal evolved into India’s most beloved comfort food.
Today, home cooks frequently search for authentic techniques to capture that distinct street-side aroma. While standard recipes yield decent results, mastering the nuances of boiling, mashing, and tempering makes all the difference. Furthermore, balancing spice levels with rich dairy ensures your homemade version tastes just like it came from a professional Chowpatty stall.
“Food is not just eating energy. It’s an experience, a memory, and a way to bring people together around a shared table of comfort and flavor.” — Chef Ranveer Brar
Essential Ingredients Breakdown for Authentic Flavor
Every great dish relies on a harmonious balance of fresh components. To execute the authentic pav bhaji chef ranveer brar recipe successfully, you need to gather high-quality produce and spices. Here is a comprehensive overview of what goes into the pot:
- Vegetable Base: Cauliflower florets, peeled carrots, cubed potatoes, and green peas create a thick, nutritious base.
- Aromatics & Spices: Finely chopped onions, vibrant capsicum, fresh ginger-garlic paste, and green chilies.
- Spice Powders: Deggi red chili powder for color, turmeric, and high-quality pav bhaji masala.
- The Secret Element: Generous amounts of butter, fresh tomato puree, and a squeeze of lime juice to finish.
| Component | Traditional Approach | Chef Ranveer Brar Method |
|---|---|---|
| Veggie Prep | Boiled separately or unevenly | Pressure cooked together with butter for deep flavor infusion |
| Masala Timing | Added all at once | Added in two distinct stages for layered aroma |
| Consistency | Often too thick or dry | Kept intentionally sloppy with controlled water additions |
Step-by-Step Cooking Guide for the Ultimate Bhaji
Precision during preparation ensures your bhaji achieves that signature velvety texture. Follow these structured steps carefully to get restaurant-quality results every single time:
- Boil the Vegetables: In a pressure cooker, combine cauliflower, diced potatoes, green peas, carrots, a pinch of salt, and a small pat of butter. Cook for 4 to 5 whistles until completely soft and mushy.
- Mash Thoroughly: Use a sturdy potato masher to blend the boiled vegetables into a smooth, uniform porridge consistency while still hot.
- Build the Tempering: In a large skillet or tawa, heat oil and butter on medium flame. Sauté finely chopped onions until translucent, then add ginger-garlic paste and chopped capsicum.
- Incorporate Tomatoes: Add fresh tomatoes and deggi red chili powder. Cook until the mixture breaks down completely and releases oil along the edges.
- Layer the Masala: Add half of your pav bhaji masala at this stage, followed by the mashed vegetables. Mix thoroughly.
- Simmer and Finish: Adjust the consistency by adding warm water little by little. Simmer for 5 to 6 minutes, then stir in the remaining pav bhaji masala, a dollop of fresh butter, and lime juice.
“The secret to a great bhaji lies in patience—letting the vegetables marry the spices slowly while butter works its magic.” — Culinary Insights Journal
Expert Tips for Achieving Street-Side Perfection
Recreating authentic street food requires understanding the subtle tricks professional chefs use. Therefore, pay close attention to heat management and ingredient quality. For instance, adding the spice masala in two separate stages builds depth that single-add spice mixes lack.
Additionally, never let your bhaji dry out completely. Street vendors keep their griddles moist with recurring splashes of water and melted butter, resulting in a loose, sloppy consistency. You can explore more professional cooking insights directly on platforms like Ranveer Brar’s Official Website to refine your kitchen skills further.
Frequently Asked Questions
Can I make this recipe without a pressure cooker?
Yes, you can easily boil the vegetables in a deep stockpot until they become thoroughly soft and mashable. However, pressure cooking speeds up the process and softens the fibers much better.
Why is my bhaji turning out too pale?
To achieve that signature bright red street-side color without artificial dyes, always use high-quality Kashmiri deggi red chili powder during the tempering stage.
How should I toast the pav properly?
Melt generous amounts of butter on a hot tawa, sprinkle a pinch of pav bhaji masala or red chili powder, and press the bread rolls into the foaming fat until warm and coated.
Conclusion
Mastering street-style pav bhaji at home is an rewarding culinary adventure that brings people together. By following Chef Ranveer Brar’s expert techniques—such as staged masala addition and maintaining a loose consistency—you can easily recreate magic in your kitchen.
Ready to elevate your cooking game? Try this recipe tonight, gather your family around the table, and share your delicious creations with us in the comments below!