

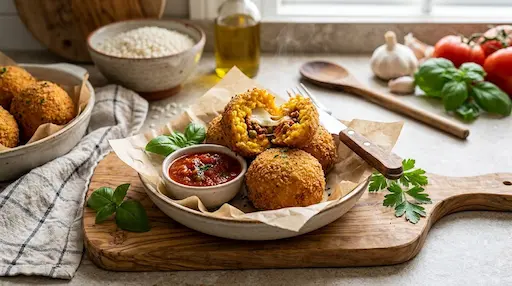
Craving crispy, golden-brown Italian street food that melts in your mouth? Learning how to prepare classic arancini di riso transforms simple leftover risotto into an extraordinary culinary masterpiece.
Legendary Italian chef Gennaro Contaldo reminds us that traditional cooking is all about resourcefulness and deep flavor. When you follow authentic techniques, you achieve that iconic crunchy exterior and a luxuriously gooey, cheesy center without any guesswork.
Whether you are hosting a weekend dinner party or simply looking for comfort food, this comprehensive guide breaks down everything you need to know. Let us explore the heritage, step-by-step preparation, and professional secrets behind these famous stuffed rice balls.
The Rich History and Heritage of Arancini
Originating in Sicily around the 10th century, arancini derive their name from the Italian word for “little oranges.” This comparison stems from their warm, golden color and round shape after frying.
Food historians note that Arab influences introduced saffron-infused rice and savory meat fillings to the region. Over centuries, various Italian provinces adapted the concept, turning everyday grains into celebrated comfort food.
“Simple arancini are a great way to use up leftover risotto bianco and make a fantastic meal in themselves.” — Gennaro Contaldo, Italian Culinary Master
According to culinary insights shared by platforms like Jamie Oliver’s Food Tube, mastering this dish relies heavily on proper rice consistency and temperature control. Therefore, starting with well-chilled risotto is non-negotiable for structural integrity.
Essential Ingredients for Authentic Rice Balls
Gathering high-quality ingredients ensures your final dish tastes like it came straight from a rustic Italian trattoria. You do not need overly complicated items, but freshness matters significantly.
The core components include cooked arborio or carnaroli risotto, a rich bechamel or cheese filling, eggs, plain flour, and fine breadcrumbs. Furthermore, maintaining a neutral oil with a high smoke point is vital for clean frying.
| Component | Traditional Ingredient | Pro Tip |
|---|---|---|
| The Base | Chilled Risotto Bianco with Parmigiano Reggiano | Chill overnight so the starches firm up completely. |
| The Core Filling | Rich béchamel paste and diced cheese | Keep filling thick to prevent leaking during frying. |
| The Coating | Flour, light egg wash, and breadcrumbs | Ensure an even layer to lock out excess oil. |
Step-by-Step Preparation: Cooking Like Gennaro
Proper execution requires patience and precise temperature management. Let us break down the process into clear, manageable phases.
- Preparing the Base: Cook your risotto al dente using a rich stock, butter, and aged Parmigiano Reggiano. Spread it flat on a plate and chill overnight in the refrigerator.
- Crafting the Filling: Create a thick, velvety béchamel sauce infused with high-quality cheese, then chill it until firm.
- Shaping the Balls: Moisten your hands with cold water. Flatten a handful of risotto in your palm, place a dollop of filling in the center, and wrap the rice securely around it into a smooth sphere.
- Breading and Frying: Dust each ball lightly in flour, dip in beaten egg whites, and roll thoroughly in breadcrumbs. Fry in hot oil at 150 degrees Celsius until deeply golden.
In addition to these core steps, always fry your rice balls in small batches. Crowding the pan lowers the oil temperature and leads to greasy, unevenly cooked crusts.
Common Pitfalls and How to Avoid Them
Even experienced home cooks encounter minor hurdles when frying stuffed rice items. Keep these expert strategies in mind to guarantee success:
- Using Warm Rice: Never attempt to shape warm risotto, as it will disintegrate in your hands and collapse in the hot oil.
- Thin Fillings: Ensure your inner cheese or sauce mixture is sufficiently dense so it does not puncture the outer rice layer.
- Incorrect Oil Temperature: If your oil is too hot, the crust burns before the cheese melts. If too cold, the rice absorbs excess oil.
- Skipping the Rest Step: Always let fried arancini drain on paper towels for a couple of minutes before serving.
By avoiding these common mistakes, you will consistently produce professional-grade street food right in your own kitchen.
Frequently Asked Questions
1. Can I make arancini without leftover risotto?
Yes, though leftovers make the process much easier. You can cook a fresh batch of risotto specifically for this recipe, provided you cool and chill it thoroughly before shaping.
2. What is the best oil for frying arancini?
Neutral oils with high smoke points, such as peanut oil, sunflower oil, or vegetable oil, work best because they do not overpower the delicate flavors of the cheese and rice.
3. How do I reheat leftover arancini?
To retain that signature crunch, reheat them in a preheated oven or air fryer at 180 degrees Celsius for about 10 to 12 minutes. Avoid the microwave, which makes the crust soggy.
4. Can I freeze un-fried arancini?
Absolutely! You can assemble and bread the rice balls, then freeze them on a tray before transferring them to a freezer bag. Fry them directly from frozen, adding a couple of minutes to the cooking time.
Conclusion
Mastering the art of traditional Italian rice snacks is a rewarding culinary journey that connects home cooks with centuries of Mediterranean heritage. By following expert techniques inspired by culinary masters like Gennaro Contaldo, you can effortlessly turn simple grains into crispy, golden perfection.
Are you ready to test your skills in the kitchen and whip up a batch of delicious homemade treats? Try this recipe today, share your results with fellow food enthusiasts, and elevate your next dinner gathering with authentic Italian flavors!