

Many home cooks struggle with broken grains or uneven textures because they skip foundational preparation steps. However, understanding professional culinary techniques allows anyone to replicate perfect rice right in their own kitchen. Furthermore, paying attention to water ratios and cooking times eliminates guesswork once and for all.
Why Proper Rice Preparation Matters
The secret to exceptional boiled rice lies in managing excess starch and ensuring even hydration. When raw grains sit in packaging, they accumulate fine starch dust. Therefore, washing the grains thoroughly until the water runs completely clear is a crucial first step that prevents clumping.
In addition, soaking the rice for twenty to thirty minutes allows the grains to expand uniformly before heat is ever applied. According to culinary experts at Two Cloves In A Pot, proper soaking reduces overall cook time by up to twenty percent while helping grains elongate to their maximum potential.
“Properly rinsing and soaking basmati rice acts as the ultimate foundation for separating individual grains, giving you that coveted long-grained, fluffy texture every single time.” — Culinary Heritage Guide
When you combine these preparation practices with the right boiling method, your finished dish achieves an ideal al dente texture that absorbs flavors seamlessly.
Step-by-Step Chawal Boil Karne Ka Tarika
Follow this detailed, foolproof method to ensure your rice grains remain distinct, tender, and aromatic.
Step 1: Thorough Rinsing
Place your desired quantity of basmati rice into a large mixing bowl and cover it with cold water. Gently agitate the grains with your hand to release surface starch. Strain the cloudy water and repeat this process five to seven times until the water runs completely crystal clear.
Step 2: Essential Soaking
Submerge the clean, drained rice in fresh cold water and let it rest for twenty minutes. This hydration step allows the starch molecules to stabilize, which prevents the grains from snapping or cracking during the active boiling phase.
Step 3: Rolling Boil and Salt
In a large, wide-rimmed pot, bring a generous amount of water to a rolling boil. Add salt and optional whole spices like cloves or cardamom. Using plenty of water gives the grains ample room to circulate and expand evenly.
Step 4: Boiling to Al Dente
Drain your soaked rice and drop it gently into the boiling water. Cook over medium-high heat for approximately seven to eight minutes without aggressive stirring. Test a grain between your fingers; it should feel tender on the outside with a slight firm bite in the center.
Step 5: Straining and Steam Infusion
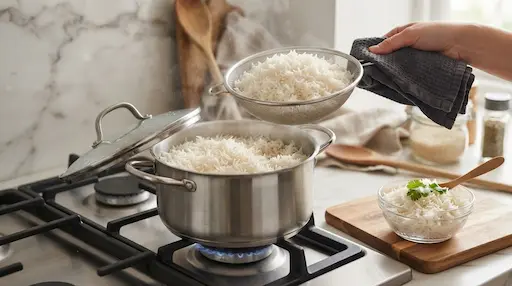
Immediately pour the contents through a fine-mesh colander to drain all boiling water. Return a teaspoon of oil or ghee and a splash of water to your empty cooking pot, add the strained rice back, cover with a tight lid, and let it steam on very low heat for ten minutes.
Comparison of Popular Rice Cooking Methods
To help you choose the best technique for your recipe, review the comparison table below highlighting different approaches to cooking rice.
| Method | Water Ratio | Best Used For | Texture Result |
|---|---|---|---|
| Boiling & Straining | Abundant water (Drain method) | Biryani, Pulao, Daily meals | Extremely fluffy, separate grains |
| Absorption Method | 1 cup rice to 1.5 cups water | Quick weeknight meals | Soft, moist, cohesive grains |
| Pressure Cooker | 1 cup rice to 1.75 cups water | Fast preparation | Soft, tender, denser texture |
Expert Tips for Flawless Results Every Time
Mastering this technique involves more than just following timing instructions. First, always select a wide-rimmed pot rather than a tall, narrow saucepan. A wider surface area ensures heat distributes evenly across all grains.
Furthermore, avoid using heavy wooden spoons when stirring hot rice, as this can easily fracture the delicate grains. Instead, opt for a flat silicone spatula or a traditional rice paddle, using a gentle folding motion. Finally, let the cooked rice rest undisturbed off the heat for five minutes before fluffing.
“Allowing your cooked rice to rest with the lid sealed before serving lets the internal steam redistribute evenly, resulting in a professional, restaurant-grade finish.” — Global Recipe Digest
By keeping these expert practices in mind, your homemade rice dishes will consistently impress family and guests alike.
Frequently Asked Questions
Why do my rice grains break while boiling?
Rice grains often break because of aggressive stirring while hot or because the rice was not soaked properly beforehand, causing uneven internal expansion.
Is rinsing mandatory before boiling rice?
Yes, rinsing removes excess surface starch, which is the primary culprit behind gummy, sticky, or clumped-together cooked grains.
How long should basmati rice soak in water?
Soaking basmati rice for twenty minutes hydrates the grain, promotes uniform elongation, and reduces total cooking time on the stove.
What is the best way to keep cooked rice warm?
Keep your cooked pot tightly sealed with a clean cloth or foil under the lid, resting on low heat or a warm tawa to maintain moisture.
Conclusion and Next Steps
Mastering the art of boiling rice elevates your everyday cooking from ordinary to extraordinary. By applying proper rinsing, soaking, and boiling steps, you ensure that every single meal features light, separate, and aromatic grains.
Ready to explore more culinary secrets and expert kitchen guides? Bookmark our food blog and subscribe to our newsletter today to receive professional tips and delicious recipes straight to your inbox!